Sunday 30 November 2014

My Partner's Fifth Attempt at My Design


This is the first time my partner has completed my hair design and I am quite happy with how it looks. The padding is not even on both sides, but Charlotte said she was feeling more confident with her padding skills so she will try and make them even next time. I am happy with how she sprayed the french plait and other plaits because I was concerned the colour wouldn't show up very well on my dark hair. There are a lot of stray hair round the bottom of my hair so I have discussed with Charlotte that she will use gel or hair spray to smooth them up. After prepping the hair style, by crimping it and sectioning it, it took Charlotte 1hr 45 to complete. This is over the time limit. Charlotte said she felt stressed that she wouldn't be able to complete the design in the time limit and asked if I could modify it slightly to make it quicker to do. We talked through what maybe wasn't as necessary in the hair design and we both agreed that the french plaits on the side of the head could be taken out because they aren't very visible anyway. This would save a lot of time and there would be more room for the padding. I have therefore decided to remove the french plaits on the sides of the head and use that hair for the padding. 

Friday 28 November 2014

My Partner's Fourth Attempt at My Design


This was my partner’s fourth attempt at my hair design and she felt it went a lot better than her previous attempts. We decided that we should do the padding first because she felt that she needed the most practice with that part of the design. She thought her padding technique had improved.  She decided to split the top section of hair in three and put them over the padding separately so she had more control. She also found that the underneath part of the padding looked neater if she did it in sections because she could cover the joining with the next section along. Even though she felt she had improved the padding, she found it hard to get them looking even on both sides. We will focus on getting them the same on both sides in the next practice. She then practiced getting the bun at the back more flat against the head because we both found that the bun was dropping slightly which was not the look I was after. We therefore decided to practice making the bun looking wider and more flat against the head. She found that if she pushed her hand against the head then it kept its shape. 

When we practice getting both sides of the padding equal, we are going to aim for the right side from this practice (as you look at it), because I wanted the padding to be more or less flat with the head as I don't want them to look like ears. 

Thursday 27 November 2014

My Partner's Third Attempt at My Design

My partner knew that timing was the issue, but we took our time with this practice so that I could really explain to her what I wanted and how I wanted it done. I took a photo of some of the stages she did to achieve the look.

These were the sections that Charlotte made for the
padding and french plaits. 

Charlotte was very happy with how her layered
french plaits looked. 

This shows when I had the padding on just one
side of my hair. 

This is a side view of one side of the padding. I am really happy
at how it looks from the side because it looks very smooth and
even. 

This is what the padding looked like when both sides
were completed. They are not even, but my partner was
struggling to get the padding in at all so we'll work on
perfecting her padding skills first and then worry about
getting them even.  

This is when I was showing Charlotte how I wanted
the padding to look like so that she could take a photo
and practice on her model head. 

I was happy with how the bun looked and the clear
elastic will be covered with orange hairspray so it
won't be as visible. 

This is a side, back view of the look. 

The hair design took a very long time to do and we didn't have time to complete it, even though we spent 3 hours on it. My partner found the padding the most challenging. She found that the length of my hair was a problem because she was so used to doing padding on the doll heads, with much shorter hair. She found that she didn't know where to put the excess hair, but I taught her a technique where you wrap the ends round two fingers and then twist it under until you reach the bottom of my padding. She practiced this technique and found it helped so she will continue to use this technique when putting padding in my hair. She was confident with her french plaits, but said she needed to practice the regular plaits because she kept getting random loops in them. She was happy with the bun at the back and liked how it looked with all the plaits wrapped round it. We didn't have time to experiment with the coloured spray in this practice, but we are hoping to in our next practice. I am happy with how the look is coming along and I think that my partner will be able to get my design looking how I want it; however I am concerned that the look will not not be completed in the time limit.

Wednesday 26 November 2014

Final Practice of My Partner's Design

This was the final time I got to practice my partner's hair design and I a really happy with how it went. We talked to the teacher about the hair design and she that we could do some preparation work before the timed assessment started. She told us exactly what we could do for our prep and we worked out that the prep took us 1hr 30. The images below show what I am allowed to do to the hair before the timed assessment. I am going to crimp the bottom section and frizz half of the head, and also flatten the top section of the hair. I will wait until the timed assessment has started to use the straighteners on all the frizzing. 

Left side.

Back view.

Right side.


The Final Look

Back view.

Right side view.

Left side view.

Front view.
This was my final practice before my assessment and I am really happy with how it turned out! I timed that, after the prep work, I would need 1hr to do complete this look which is perfect for the time limit that we have. In the assessment I will make some changes to improve the look, including adding more hairspray to the top section of the hair to make it even flatter and smoother. I also want to add more pearls as I think the bottom section of the hair looks slightly bare. I am really happy with how I backcombed this look; I backcombed it on the top and the bottom to give it that rounded look on the bottom. I to tie the two plaits together with a hair elastic to make it more sturdy, as I found the clip I used in my last practice didn't hold the plaits tight enough.

Tuesday 25 November 2014

Step by Step of my Partner's Design

Equipment:
- Hair grips
- Hair pins
- Hair clips
- Clear hair gel
- Pearls
- Hair piece
- Paddle brush
- Pin tail comb
- Crimper
- Straighteners

Step by step:
1. I first sprayed the top of her hair with hair spray and used the pin tail comb to smooth it down against her head. I smoothed the front bit behind her ears. I took a section of hair just above the ear to use as a plait to go over the hair. The size is as shown in the images below. I clipped back the hair just behind this so that I knew what it would look like.


2. I used hair grips all round the head to secure the flat hair down onto the head. I went round the head in sections, hair spraying the hair and then combing it down flat, so that I could really concentrate on each section. I did the two front sections first so that I could make sure that they were level.


3. I then took a section just underneath the hair grips so that I could use the frizzing technique on that section. I pinned these sections up onto the head with hair clips. I then wanted to crimp the rest of the hair so I did this in sections, clipping the hair up and working my way upwards. The image on the right showing how much of the hair I crimped and how much I clipped up to frizz.


4. Starting from the front, I took small sections and began doing the frizzing technique on all of the top section. I tried to get the frizzing as close to the grips as possible. I continued this technique all round the head.

5. I used some hair straighteners to press down on every frizzed section, making sure not to miss any out! After letting them all cool down, I took all the hair grips and pins out. I then brushed out all the crimped and frizzed hair and back combed it slightly to give the hair lots of volume.


6. I then took out all the hair grips and used hair spray to smooth down the top section with the pin tail comb and my hands. I next plaited each side section and pulled them both to the back. I twisted them round each other and secured them with a hair grip, facing down.


7. I added a hair piece in the middle of the plaits at the back to hide the joining of the plaits.


8. I back combed the hair even more, including the underneath layers, so that the hair had more volume. 


9. I dotted some pearls around the lower section of the hair, in a random pattern. I dunked the pearls in hair gel and then placed them in the hair to make them stick. Below is the final look!


I am really excited by how this look came out! To improve it, I would try and back comb the hair even more and use hair spray to help the back combing stay in the hair. I would also try and make the top half of the hair even smoother and flatter to the head so that there is more contrast between the top and bottom half. I would also try and get the frizzing to go closer to the plaits so that there isn't a gap of flat hair. I really like the hair piece that my partner chose because it makes the look a lot more glamorous and expensive looking. I also really like the pearls because they add something different to the look. 

My Hair Design: Step by Step

Equipment:
- Pin tail comb
- Hair elastics
- Crimper
- Paddle brush
- Hair grips
- Hair clips
- Padding
- Red hair spray
- Orange hair spray
- Sheets of paper

Step by Step:
1. You first section off the bottom section, starting at the top of both ears and curving up in the centre. Secure this in a loose ponytail to keep out of the way.


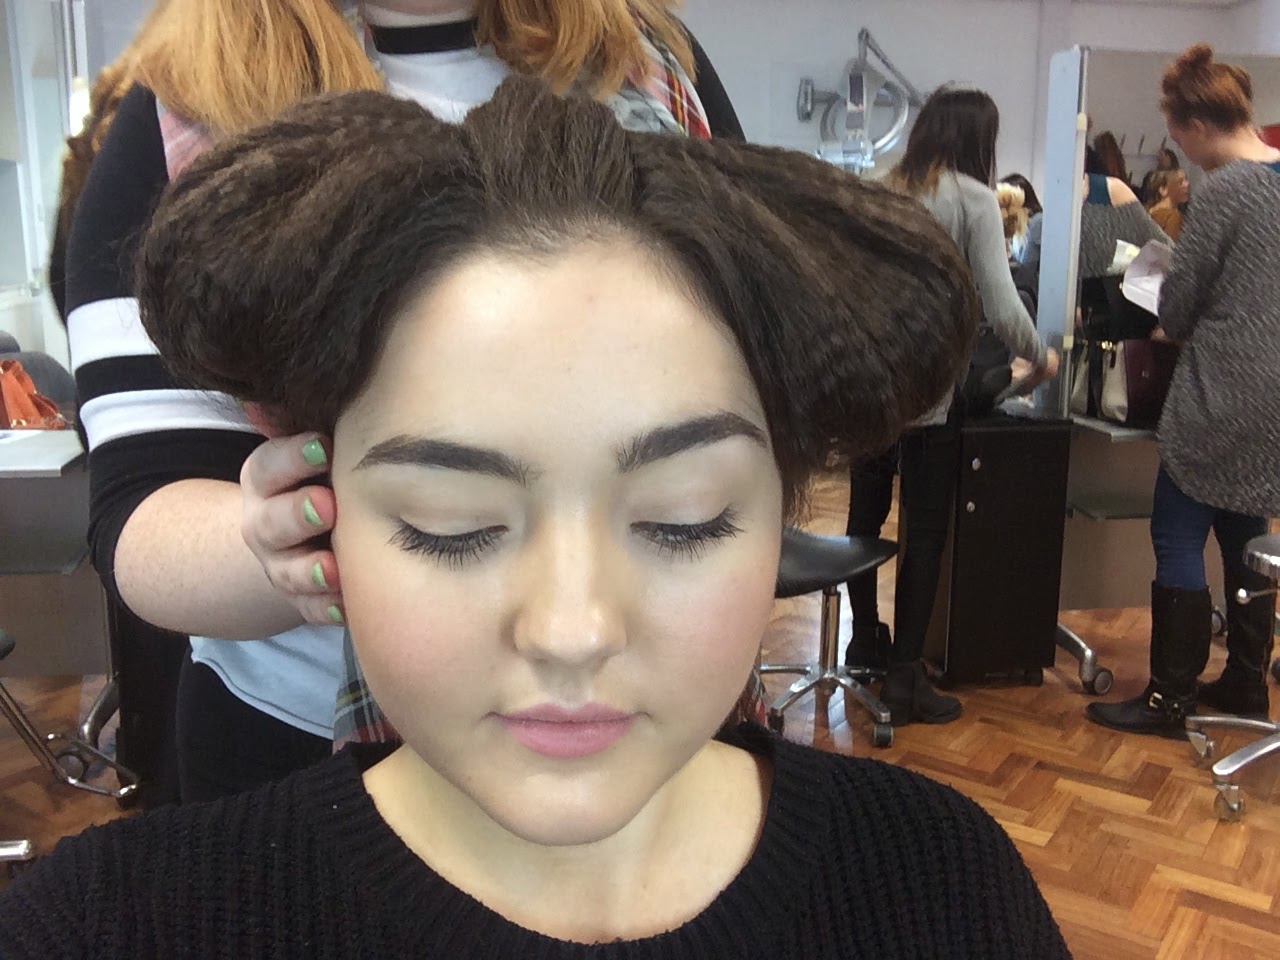
 2. Using a crimper, crimp the rest of the hair outside the ponytail. Do this in sections going upwards to make sure all of the hair is crimped. Try to go as close to the root as possible.


 3. Bush out all the crimped hair using a big paddle brush.


 4. Using a pin tail comb, create a section in the middle of the head, roughly keeping to the width of the model's eyebrows. The section starts at the front of the head and ends right up until the back ponytail. Make this as straight and even as possible.


 5. Create a french plait on this middle section and secure at the end of the french plait with a hair elastic. Split the hair coming out of the french plait into two equal sections. Plait each section and secure at the end with hand elastics.


6. Using a pin tail comb, create a french plait on either side of the head, roughly the width of the french plait in the image below. These sections will run all the way along the edges of the ponytail section. 


7. Make sure the sections left are even and big enough to be able to use padding on those areas. Continue the french plaits on each side of the head into regular plaits and secure them at the end with a hair elastic. The image below is what the hair should look like from the back.


 8. Split the padding sections into 3 equal horizontal sections. Put the top two thirds together to make one section. Split the bottom third into two. Clip the bottom section and top section away to keep out of the way. Do a french plait on the middle section and continue it into a regular plait and secure with a hand elastic. Turn the end of the french plait back on itself to create a layered look, like shown below. Secure this with hair grips.


 9. Secure the padding onto the overlapped plaits with hair grips and make sure it is very secure as there will be a lot of hair going on top and I don't want the padding to look saggy. Take the bottom section of hair and smooth it over the padding. Take two fingers and wrap the ends round your fingers to them tuck the twisted hair under the padding. Pull this hair tight so that it acts as extra support for the padding.


 10. Take the top section of hair and smooth it over the padding. Make sure none of the padding underneath the hair is visible. Do the same technique with wrapping the hair, flat, round two fingers and pushing it underneath the padding. Try and make the top of the padding flat with the head and try to keep the bottom of the padding looking neat. Repeat this on both sides, trying to make them as equal as possible.


11. Put the very bottom section into a tight ponytail, about half way up the head. Smooth any flyways with hair spray. Split the ponytail into two equal parts and twist the two section round each other, trying to keep it tight, and then wrap the twisted hair round to make a bun shape. Secure this bun with hair grips.


12. Take an A4 sheet of paper and hold it on one side of the french plait, then use the red hair spray to spray along that side. Put the sheet of paper on the other side and spray the red colour down that side. Spray the red hair colour down the centre of the french plait very carefully so that no colour gets on the padding. Spray the colour until about 2/3 of the ways back and then fade it out slightly. Take orange hair spray and, using the same sheet of paper technique, spray the rest of the way back until the hair elastic at the end of the french plait.


 13. Take a sheet of A4 paper and make a hole on the middle for each of the plaits to go through, push the plait through the hole and hold the paper as close to the head as possible. Get the orange hair spray and spray the plaits on both sides so that the plaits are completely covered. Get another piece of paper if the hair is longer than the top piece of paper to spray the ends with colour. Do this technique to cover all 4 of the plaits in orange spray.

14. To remove the paper from round the plaits, rip the paper and gently pull the paper away. Be gentle because the hair spray can crack and fall on the rest of the hair design. 


 15. Wrap the two middle plaits around the bun at the back, wrapping them outwards. Secure these with hair grips and make sure the hair elastics aren't visible.


 16. Wrap the two outside plaits down and around the bun and secure the ends with hair grips.


 The Final Look