Books
- A Guide to Tudor & Jacobean Portraits, Foreword by Antonia Fraser
- The Usborne Encyclopedia of World History
Films
- Elizabeth: The Golden Age, directed by Shekhar Kapur, 2007
- Elizabeth, director by Shekhar Kapur, 1998
Exhibitions
- National Portrait Gallery, Tudors and Jacobean Portraits
Internet Sites
- http://thelostcolony.org/education/elizabethan-era/#lightbox/0/
- http://www.elizabethancostume.net/headwear/snood.html
- http://everythingelizabethan.blogspot.co.uk/2011/02/lets-talk-about-snoods.html
- http://www.elizabethan-era.org.uk/elizabethan-hair-styles.htm
- https://www.youtube.com/watch?v=u-BIr0fW5cU
- http://www.vogue.co.uk/fashion/spring-summer-2011/ready-to-wear/marc-jacobs
- http://runway.blogs.nytimes.com/author/cathy-horyn/page/37/?_r=0
Friday 5 December 2014
My Hair Design, Final Images and Evaluation
My Hair Design
I was initially really happy with my final hair design because it incorporated lots of plaits and french plaits, making it look really pretty and intricate. One of my favourite parts of my hair design was the french plaits over the padding because I loved how modern and unique it looked. However I was advised by one of my teachers that this, and also all of the other plaits in the look, would take too long for the time limit available. I therefore experimented with removing the french plaits over the padding or the flat french plaits in the look, but I thought that when I took away the flat french plaits it looked too plain. Another problem I found with my design was that the padding covered a lot of the french plaits on the sides so I didn't think it was worth spraying them as not much of them would be seen. This meant that I could only spray the top french plait, which I liked, but I thought it looked too much like a mohican, which was not the look I was initially going for. However I know like it because it definitely modifies the look as I can't imagine coloured mohicans were very popular in the Elizabethan times! I made my partner a step by step guide for her to follow and we talked through the look a lot until she was comfortable and confident with my design.
My partner, Charlotte, was nervous about my hair design because she wasn't very confident with her padding abilities and she had never done hair before. However after a few practices of me explaining how I wanted it done, she quickly improved and now feels more confident. We noticed that we never quite got the look finished in the lessons which concerned us, as she would only have 1hr 30 to complete the whole look in the assessment. We therefore decided that she would crimp my hair and also put it into sections before the timed assessment as her prep work, as this would save a lot of time.
I am really pleased with the final outcome and I can't believe how much Charlotte has improved with this hair design as at the beginning I was concerned she wouldn't be able to complete it. The padding is not perfectly even, but it is very close and the best she has done by miles, and I like that the padding is flat with the head. I am happy with the accuracy of the red spray paint. There are very few fly aways on the padding, making it look very smooth, clean and polished; however there are some hairs round the neck and ear that I would have liked to have been smoother away with gel. I really like the side view because if the detailing of the orange plaits and the padding looks straight. The bun at the back looks very wonky which is a shame as I think she has made it look better in the past. The plait is also wonky, leaning more to the left, which then makes the padding look wonky too. I would have liked the red and orange hair spray to have blended in slightly more with each other and for some of the red to have been seen in the back view. Overall I am really happy with the look and think that Charlotte should be proud of her improvements along the way.
Thursday 4 December 2014
Charlotte's Hair Design, Final Images and Evaluation
Before starting at Southampton Solent I had never done hair before. I was nervous because it was completely new to me, but I was excited to incorporate my new hair skills with my makeup skills to create complete looks. I learned so many new techniques in my first term and, after lots of practice, I am feeling more and more confident with my hair skills.
Charlotte's Hair Design
When we first started practicing the look, Charlotte was not sure of what she wanted to do. She knew that she wanted to use the frizzing technique on the bottom half of her hair, but she was not sure of how this was going to be achieved. We therefore worked together to come up with her final design and how it was going to be done. She initially wanted to use the frizzing technique on all of the lower part of her hair, but as we started to do this, we noticed that it was very time consuming! We therefore decided that it would be better if I crimped the lowest section and then just used the frizzing technique on the surface layer of hair, as it still gave a very similar result, but took less than half the time. I was happy with how well she listened to how I was getting on and adapted the look if she needed to. She provided me with all the extra equipment I needed and she gave me a step by step guide of how to achieve the look. I am overall very happy with how our partnering for this task went.
I was so happy with how the assessment went! I completed my prep with time to spare and set up my work station neatly to start the assessment. I completed the look in under the time limit, giving me time to try and get it to look as we both wanted. When I took the final images I noticed that one side was very slightly higher than the other which frustrated me. However I am really happy with the volume create by the frizzing and crimping. I love the contrast between the textured frizz and the flat, shiny top half. I am happy with the placement of the pearls because they are supposed to be random and I am happy with the placement of the head piece because it is central and well secured. I am pleased with how flat and smooth the top half of the hair looks, however I think the hairline could have been straighter, as it is looking a little wavy. I really like the overall styling of the shoot because her makeup looks slightly Elizabethan with the fair eyebrows, pale skin and rosy pink lips and cheeks. I wanted her shoulders to be bare so that there were no distractions from the hair design.
 |
| My hair station before starting assessment. |
Wednesday 3 December 2014
My Partner's Final Attempt at My Design
This was Charlotte's final attempt of my hair design before the assessment. We had found out, from previous experimentation, that if the hair was freshly washed, then it was more difficult to work with; since this was the day before the assessment we decided not to spray my hair with colour as I'd have to wash it off that night, the night before the assessment. I am really happy with how the practice went because she did the look within the time limit and the padding was more even than before. However she said that she would work to make the padding as even as possible in the assessment by constantly checking in the mirror. She noticed that there were stray hairs on the back on the hair and the sides, so we decided that we could use gel and/or hairspray to fix this. Charlotte found that it was easier to do the padding in smaller sections as there was less hair to deal with at once.


Sunday 30 November 2014
My Partner's Fifth Attempt at My Design


This is the first time my partner has completed my hair design and I am quite happy with how it looks. The padding is not even on both sides, but Charlotte said she was feeling more confident with her padding skills so she will try and make them even next time. I am happy with how she sprayed the french plait and other plaits because I was concerned the colour wouldn't show up very well on my dark hair. There are a lot of stray hair round the bottom of my hair so I have discussed with Charlotte that she will use gel or hair spray to smooth them up. After prepping the hair style, by crimping it and sectioning it, it took Charlotte 1hr 45 to complete. This is over the time limit. Charlotte said she felt stressed that she wouldn't be able to complete the design in the time limit and asked if I could modify it slightly to make it quicker to do. We talked through what maybe wasn't as necessary in the hair design and we both agreed that the french plaits on the side of the head could be taken out because they aren't very visible anyway. This would save a lot of time and there would be more room for the padding. I have therefore decided to remove the french plaits on the sides of the head and use that hair for the padding.
Friday 28 November 2014
My Partner's Fourth Attempt at My Design

This was my partner’s fourth attempt at my hair design and she felt it went a lot better than her previous attempts. We decided that we should do the padding first because she felt that she needed the most practice with that part of the design. She thought her padding technique had improved. She decided to split the top section of hair in three and put them over the padding separately so she had more control. She also found that the underneath part of the padding looked neater if she did it in sections because she could cover the joining with the next section along. Even though she felt she had improved the padding, she found it hard to get them looking even on both sides. We will focus on getting them the same on both sides in the next practice. She then practiced getting the bun at the back more flat against the head because we both found that the bun was dropping slightly which was not the look I was after. We therefore decided to practice making the bun looking wider and more flat against the head. She found that if she pushed her hand against the head then it kept its shape.
When we practice getting both sides of the padding equal, we are going to aim for the right side from this practice (as you look at it), because I wanted the padding to be more or less flat with the head as I don't want them to look like ears.
Thursday 27 November 2014
My Partner's Third Attempt at My Design
My partner knew that timing was the issue, but we took our time with this practice so that I could really explain to her what I wanted and how I wanted it done. I took a photo of some of the stages she did to achieve the look.
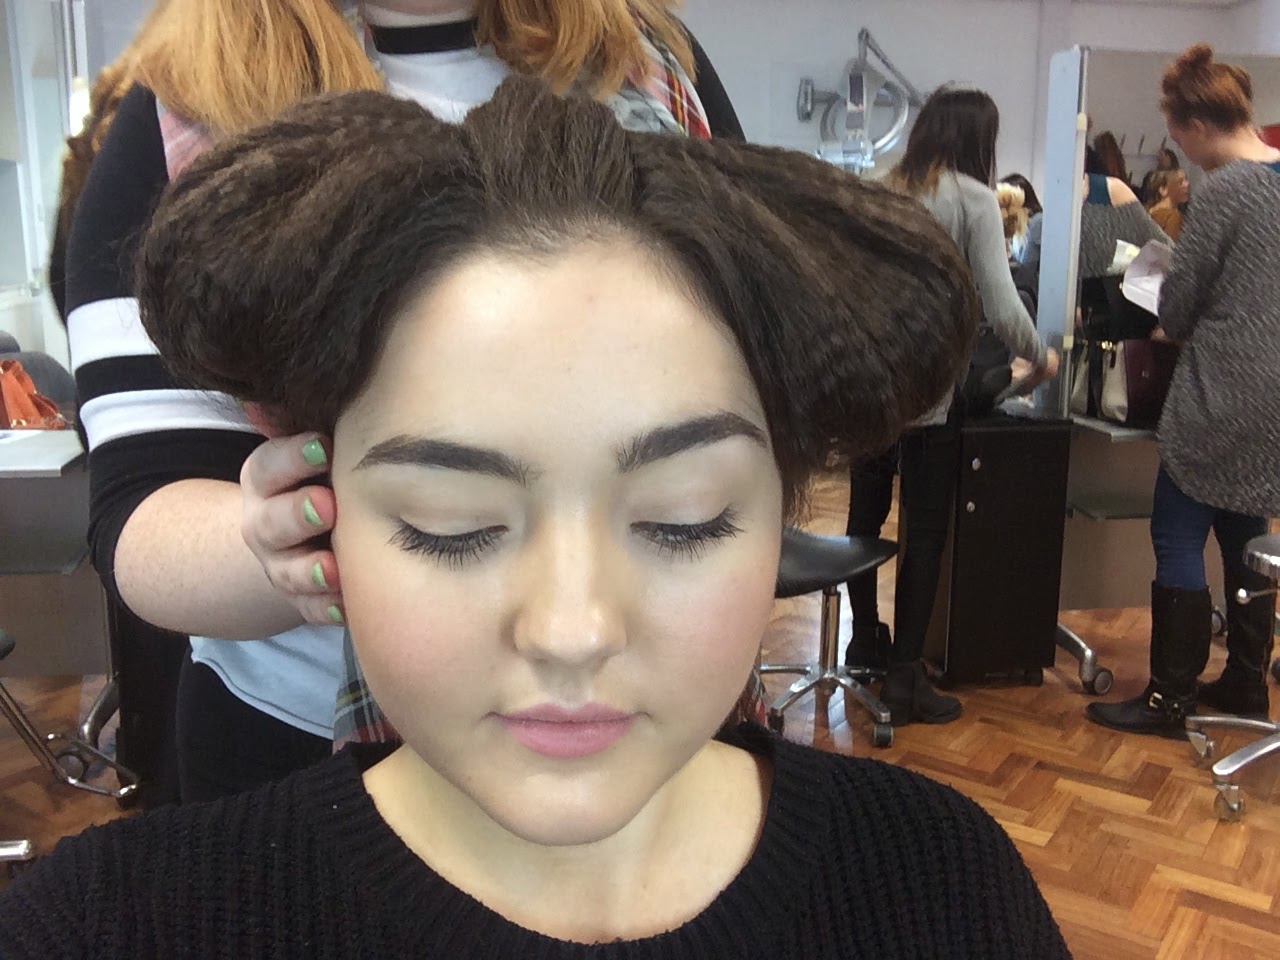
The hair design took a very long time to do and we didn't have time to complete it, even though we spent 3 hours on it. My partner found the padding the most challenging. She found that the length of my hair was a problem because she was so used to doing padding on the doll heads, with much shorter hair. She found that she didn't know where to put the excess hair, but I taught her a technique where you wrap the ends round two fingers and then twist it under until you reach the bottom of my padding. She practiced this technique and found it helped so she will continue to use this technique when putting padding in my hair. She was confident with her french plaits, but said she needed to practice the regular plaits because she kept getting random loops in them. She was happy with the bun at the back and liked how it looked with all the plaits wrapped round it. We didn't have time to experiment with the coloured spray in this practice, but we are hoping to in our next practice. I am happy with how the look is coming along and I think that my partner will be able to get my design looking how I want it; however I am concerned that the look will not not be completed in the time limit.
 |
| These were the sections that Charlotte made for the padding and french plaits. |
 |
| Charlotte was very happy with how her layered french plaits looked. |
 |
| This shows when I had the padding on just one side of my hair. |
 |
| This is a side view of one side of the padding. I am really happy at how it looks from the side because it looks very smooth and even. |
 |
| This is what the padding looked like when both sides were completed. They are not even, but my partner was struggling to get the padding in at all so we'll work on perfecting her padding skills first and then worry about getting them even. |
 |
| This is when I was showing Charlotte how I wanted the padding to look like so that she could take a photo and practice on her model head. |
 |
| I was happy with how the bun looked and the clear elastic will be covered with orange hairspray so it won't be as visible. |
 |
| This is a side, back view of the look. |
The hair design took a very long time to do and we didn't have time to complete it, even though we spent 3 hours on it. My partner found the padding the most challenging. She found that the length of my hair was a problem because she was so used to doing padding on the doll heads, with much shorter hair. She found that she didn't know where to put the excess hair, but I taught her a technique where you wrap the ends round two fingers and then twist it under until you reach the bottom of my padding. She practiced this technique and found it helped so she will continue to use this technique when putting padding in my hair. She was confident with her french plaits, but said she needed to practice the regular plaits because she kept getting random loops in them. She was happy with the bun at the back and liked how it looked with all the plaits wrapped round it. We didn't have time to experiment with the coloured spray in this practice, but we are hoping to in our next practice. I am happy with how the look is coming along and I think that my partner will be able to get my design looking how I want it; however I am concerned that the look will not not be completed in the time limit.
Subscribe to:
Posts (Atom)